Tesla Mini Supercharger
Step 1:
Make sure you have all 7 parts and your charger cable in front of you.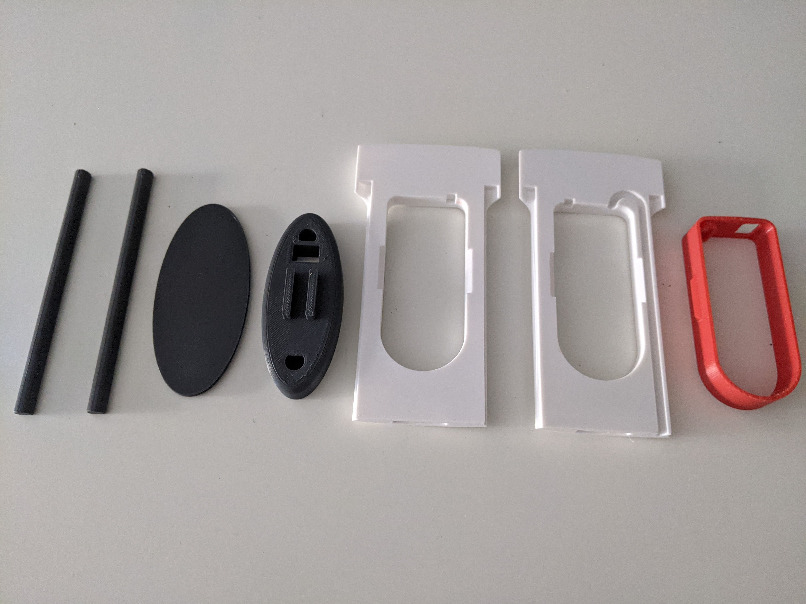
Step 2:
Take the red part and your charger cable. Insert the cable from the outside through the widest hole and make sure that the cable follows the curve of the red bottom to the smaller hole.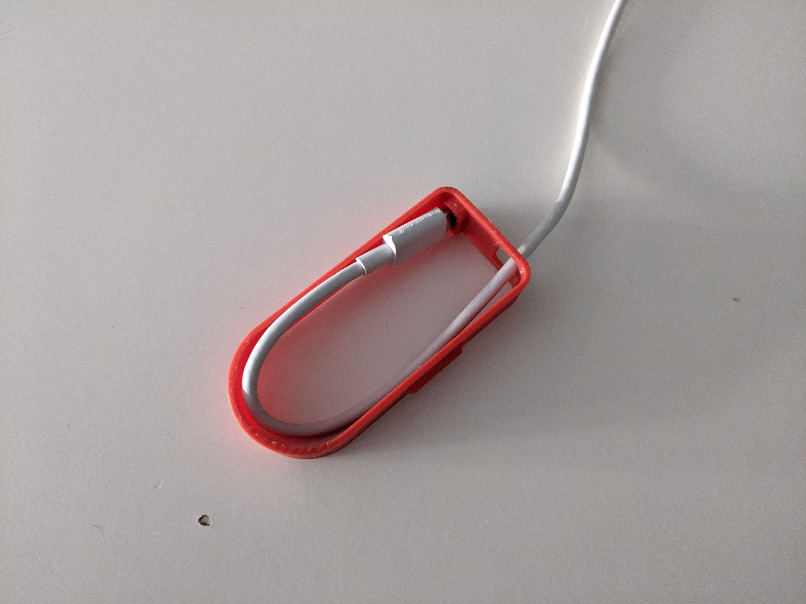
Step 3:
Take the white part with the (tent peg shaped) cove and place it, with the Tesla letters down, beneath the red part through which the cable runs. Press the red part into the white from above. Try to do this as evenly as possible.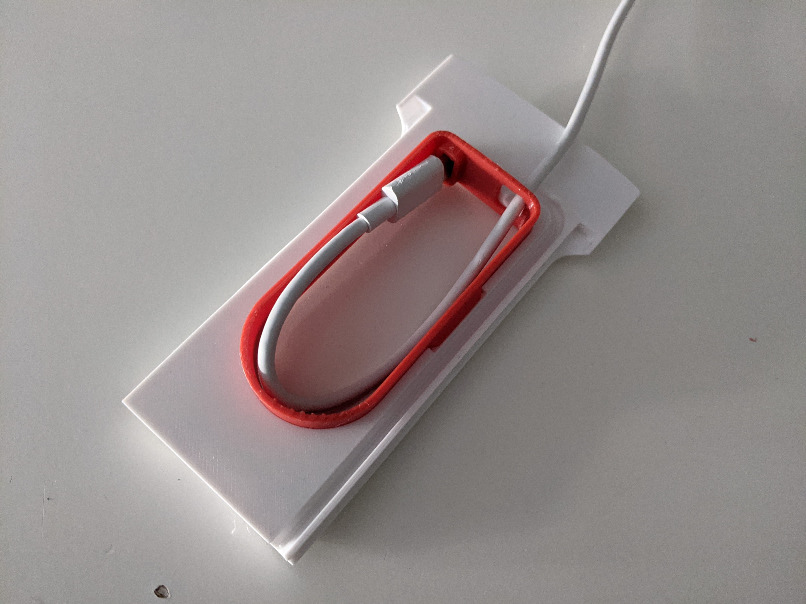
Step 4:
Press the cable as deep as possible into the tent peg shaped cove.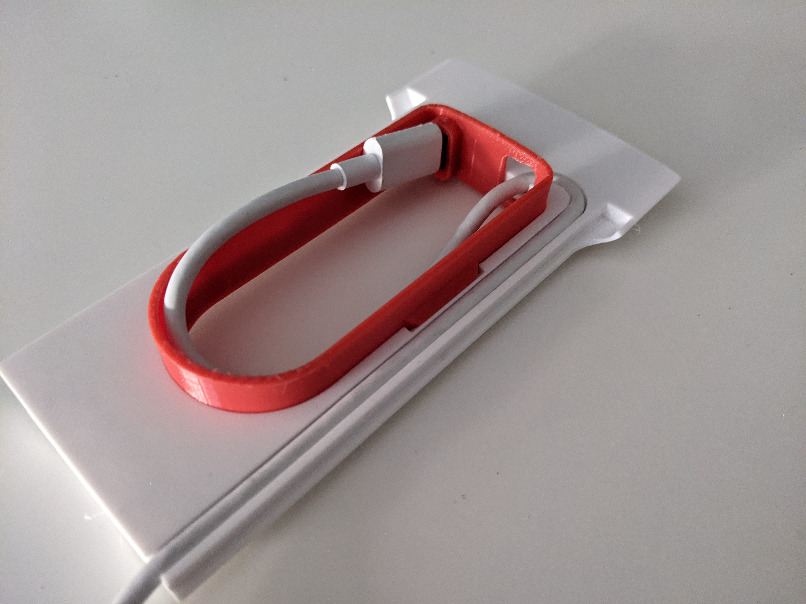
Step 5:
Take the remaining white part and place it with the Tesla letters upwards on top of the piece we just created. Also press this as evenly as possible. Grasping the parts with both hands can help.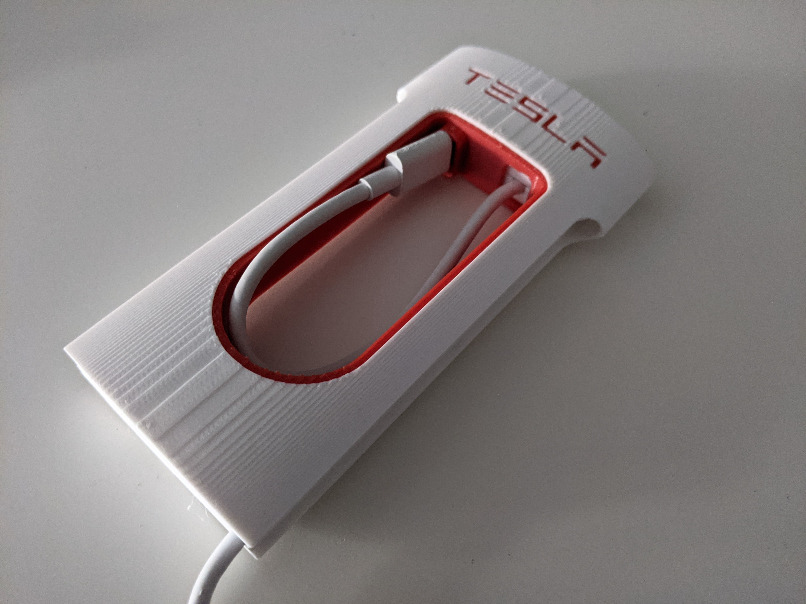
Step 6:
Grab the gray foot and already run the cable through the hole WITHOUT pressing/fixing the foot to the white parts.
Step 7:
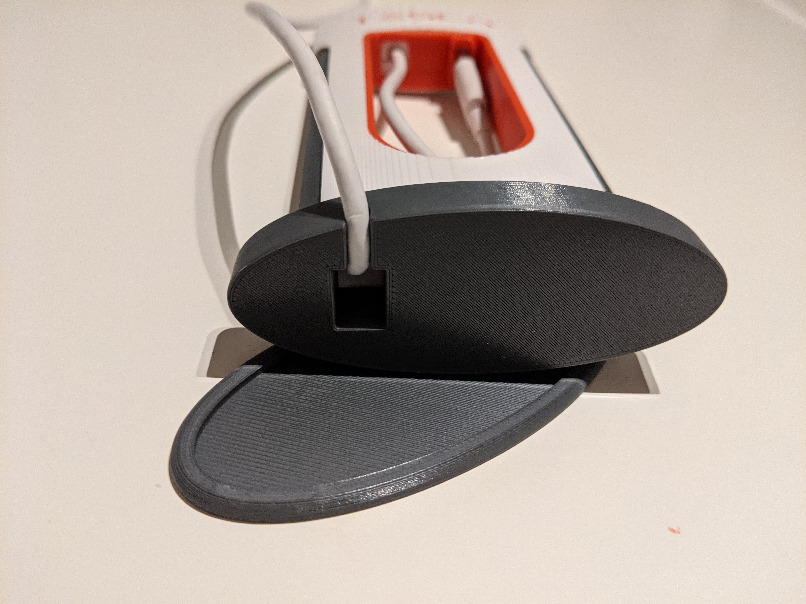
Take the two gray poles and slide them as far as possible into the sides of the created whole. Finally, press the foot and make sure the poles fall into the two holes. Press it until there is no more space between the gray base and the white part.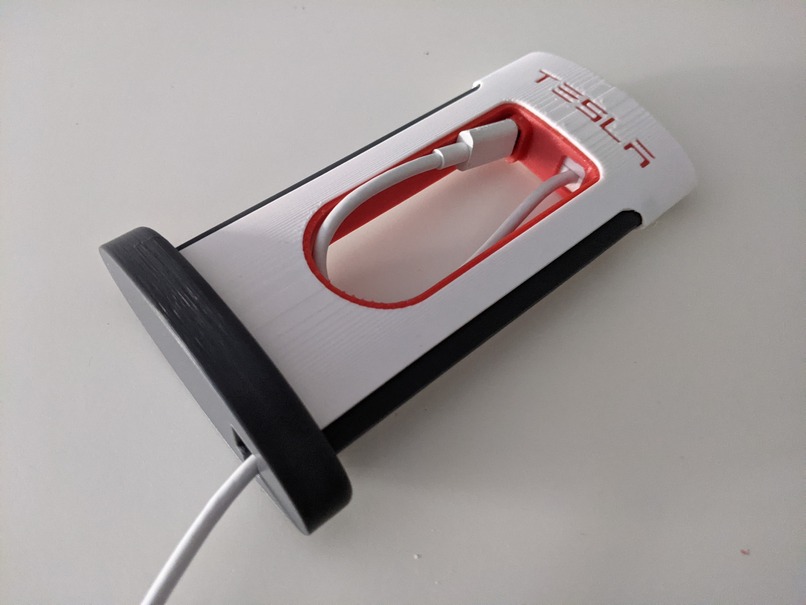
Step 8:
Press the cable where it exits the foot into the cove. So that you can install the last part without any problems.The last gray part holds the cable in place. This part is seated correctly when you hear a click.
Congratulations!
With your new Mini Tesla Supercharger :)